
This article was last updated in March of 2026.
There are several ways you can customise your Kanka campaign dashboard. We’ll start off with the options available to all campaigns, before detailing options for premium campaigns.
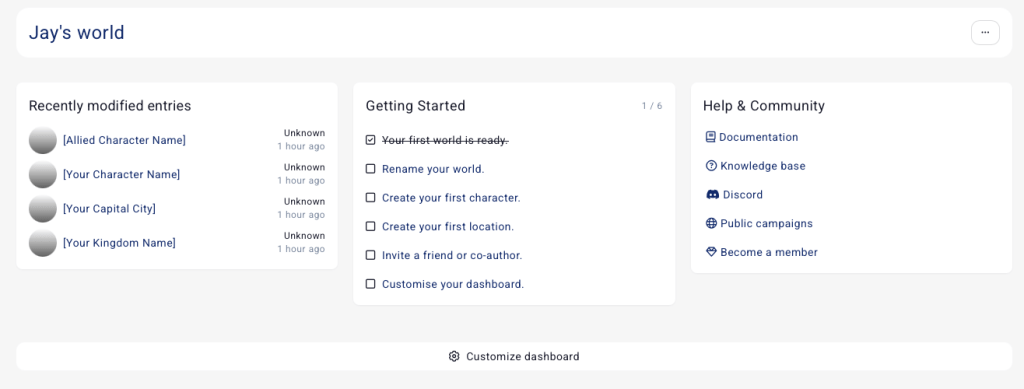
The default dashboard setup for your first campaign includes the Billboard, a Recently modified entries list, a Getting started todo list, and a Help & community helper.
Billboard
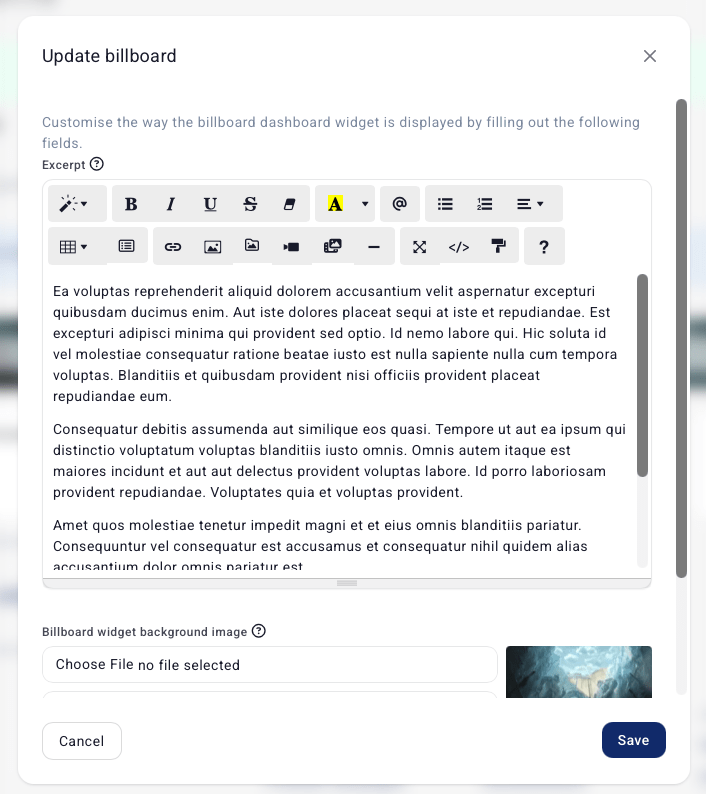
The first thing visible on every dashboard is the billboard, which serves to introduce your world. It includes the campaign’s name, short description (if added), and a potential background image. You can change these values to fit your world’s look and feel by editing your campaign.

But let’s focus on customising the dashboard! Either in the same menu, click on “Customise dashboard”, or scroll down and click on the “Customise dashboard” button. This will take you to the Dashboard Setup page, which looks like this.
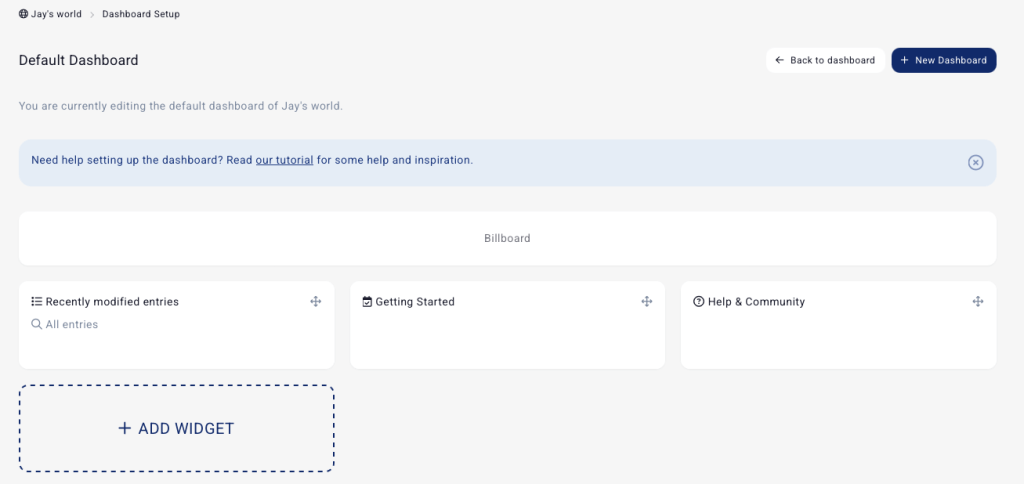
Click on Billboard to give your world a small introduction and add a background image.
In our example, the campaign header on the dashboard will now show as the following.
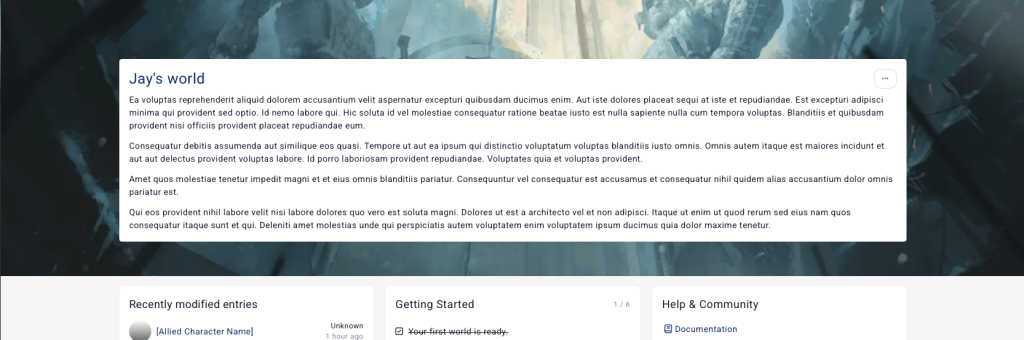
Much better!
Changing the widgets on the dashboard
To change the widgets that are visible on your dashboard, go back to the Dashboard Setup page.
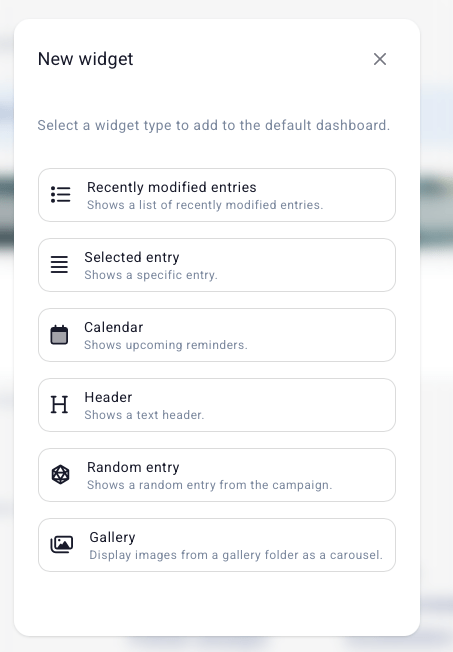
You can click on a widget to remove it, or click on the big Add widget button to add a new one. A prompt shows up offering a list of different widgets.
PS: You can also drag and drop widgets to reorder them. Moving widgets around automatically saves their new position.
Dashboard Widget Types
Recently modified entries: add this widget to display a list of entries. By default, entries that were recently modified are shown first. Options include limiting by category (for example only show recently modified characters), or filtered by tags. You can also set it to only show a single entry instead of a list, which will use the “preview” widget rendering. Advanced filters options include unmentioned or mentionless entries.

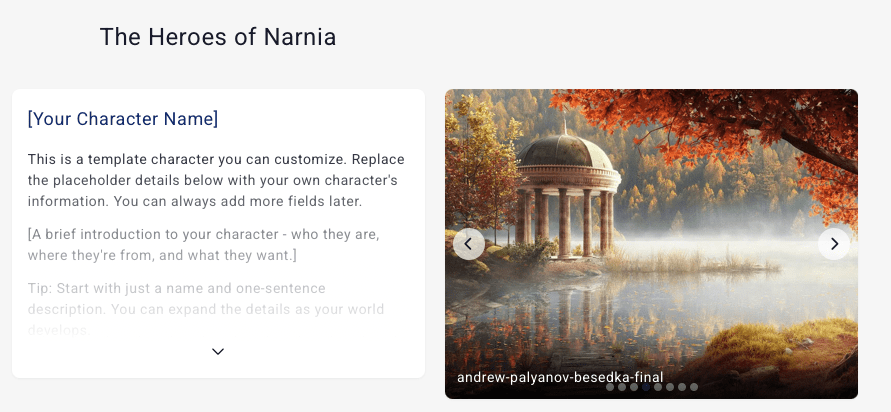
Selected entry: select an entry from to display on the dashboard. Some entries have some bonus fields, for example Quests include the quest status, and maps will be fully rendered on the dashboard. This can be especially helpful with an introduction note that explains the world you’ve created.

Calendar: display a calendar from your world, with the current date, along with a list of past and upcoming reminders. Great to remember that some important NPC’s birthday is coming up!

Header: add a custom header text to the dashboard. Great for separating sections (for example you might want a section with your heroes, and another one with your current quests).

Random Entry: displays a randomly entry from your world. You can also filter this widget to only show a specific category or by tags. For non-admin users of your campaign, only entries they have permission to see will be displayed.
Premium Campaign Features
Premium campaigns have a few more options for customising the campaign dashboard. This includes an option for the Preview widget to use the entry’s header image instead of the entry’s primary image.
Gallery: this widget is tied to a folder in your gallery and displays images.
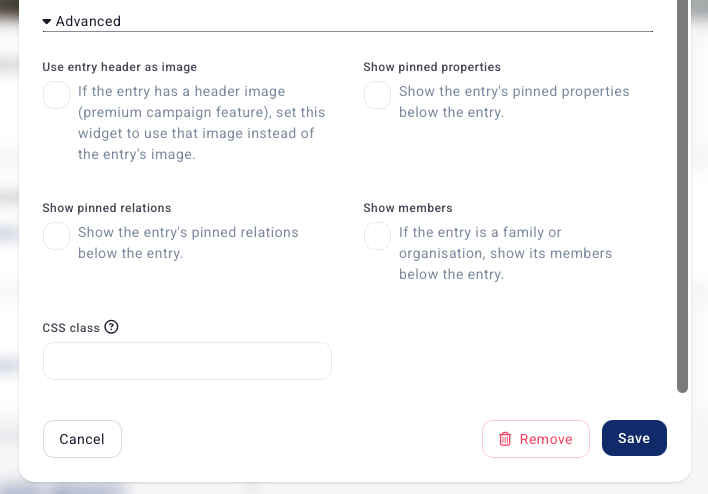
On the Selected Entry widget, premium campaigns get to show pinned relations, pinned properties, or even members for a family or organisation.
Most importantly, premium campaigns get to have multiple dashboards! Each dashboard has its own widgets. You can also set a dashboard to be only visible to a specific role, or be the default dashboard for that role.
Now that you’ve nicely setup your dashboard, invite your friends to your campaign!

Comments
4 responses to “How to set up your Kanka campaign dashboard”
Thanks, this was really helpful for making my campaign dash look better!
I noticed in a couple of the example pictures your background colour isn’t the default gray-blue. Is there a way to change that, as well?
LikeLike
Yes, boosted campaigns can edit the css of their campaign to change the background colour of all pages using the following css
.wrapper {

  background: url(url-of-an-image);

  background-repeat: repeat;

  background-size: auto;

  background-attachment: fixed;

}
LikeLike
Ablublebleblu
LikeLike
Would be nice if we could adjust the height of the widgets on the dashboard without having to muck around with CSS code, as the default layout for the character preview barely shows any of their images. Really want these to just show the full image of the character instead of a tiny slice of it.
LikeLike